HaptiBird 3.0 Complete Redesign
Project Introduction
Recently, I had the opportunity to work with the Kinsey Institute on the Trusting AI Project, also known as HaptiBird. I was approached for this project due to my experience in multi-level programming languages, networking, and the Unity engine.
Current State of the Project
 The HaptiBird game started out as a simple 2D top-down infinite side scroller based on Python 3. The core gameplay revolved around having two players that are tethered together working together to achieve a common goal. The tether would force the players closer together via a spring-like force that gets stronger the further apart they got. The goal for the players is to both pass through the same gate with a cash value above it in order to gain that cash. The catch is that the players will only gain the cash if they both pass through the same gate. If one of them hits a wall, there’s a penalty of $2 against each player.
The main issue with this version of the game is that the code for rendering assets to the screen is not standardized. It’s a custom rendering engine made by a previous research assistant that does work extremely well, but is very difficult to modify.
Transition to Unity
My role on this project was to design a completely new version of the HaptiBird game (version 3.0) from the ground up in the Unity Engine. Members of the Kinsey Institute wanted to use Unity primarily because it’s a highly optemized engine, it’s standardized and easy to make modifications, and it has built in capabilities to handle multiple input devices.
The constraints I was given to start off with were as follows:
- Players must have separate viewpoints
- Overall gameplay must be the same as versions 2.0 and 1.0
- Haptic Feedback is a necessity
The Most Basic of Basics
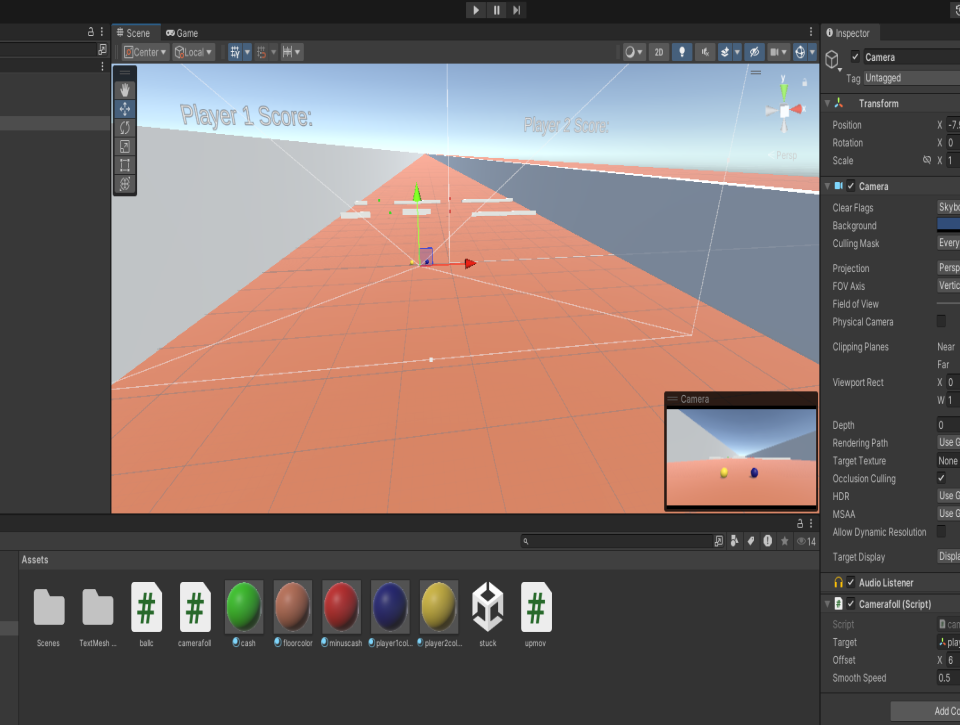
 Starting off with some of the basics, there was already a good base for both the input system and the camera controller. Version 3.0 of the game was actually started just a bit before I joined the project, and some progess had been made. The input system was able to move players around making use of the built-in Unity input system, and the camera controller was built in such a way that it kept the two player objects in view at all times from a top down perspective. Each script however, does require some modification to work properly as the constraints I was given for the project differed from the current implementation.
Rewrite of Input System
The input system was the first to get rewritten. The issue with the current implementation was that it made use of both the Unity Physics Engine, and the coordinate system, meaning it was effectively using both Physics and Translation based movement at the same time. While there’s nothing inherently wrong with this, I expected problems to appear in the long term so the first step was to consistently use one of the two systems.
I chose to use translation based movement as it’s a little easier to control programmatically. Since our players are going to be infinitely traveling in one direction and will have their bounds limited by what is essentially a tunnel, controlling the speed and other aspects of player movement would be easier this way. To begin with, a basic controller that handles analog input from multiple players is good enough for testing.
1
2
3
4
5
6
7
8
9
10
11
12
13
14
15
16
17
18
19
20
21
22
23
24
25
26
27
28
public bool controlVerticalMovement = false;
public int playerNumber = 1;
public float verticalSpeed = 5.0f;
public float horizontalSpeed = 2.0f;

PlayerController controller;
float horizontal;                 // Axis for horizontal movement
float vertical;                   // Axis for vertical movement

void Update()
{
    // transform.translate based movement system
    // Vertical Movement Logic
    if (controlVerticalMovement)
    {
        Vector3 verticalMovement = Vector3.forward * vertical * verticalSpeed * Time.deltaTime;
        transform.Translate(verticalMovement, Space.World);
    }
    else
    {
        Vector3 verticalMovement = Vector3.forward * verticalSpeed * Time.deltaTime;
        transform.Translate(verticalMovement, Space.World);
    }

    // Horizontal Movement Logic
    Vector3 horizontalMovement = Vector3.right * horizontal * horizontalSpeed * Time.deltaTime;
    transform.Translate(horizontalMovement, Space.World);
}
Dynamic Camera Positioning
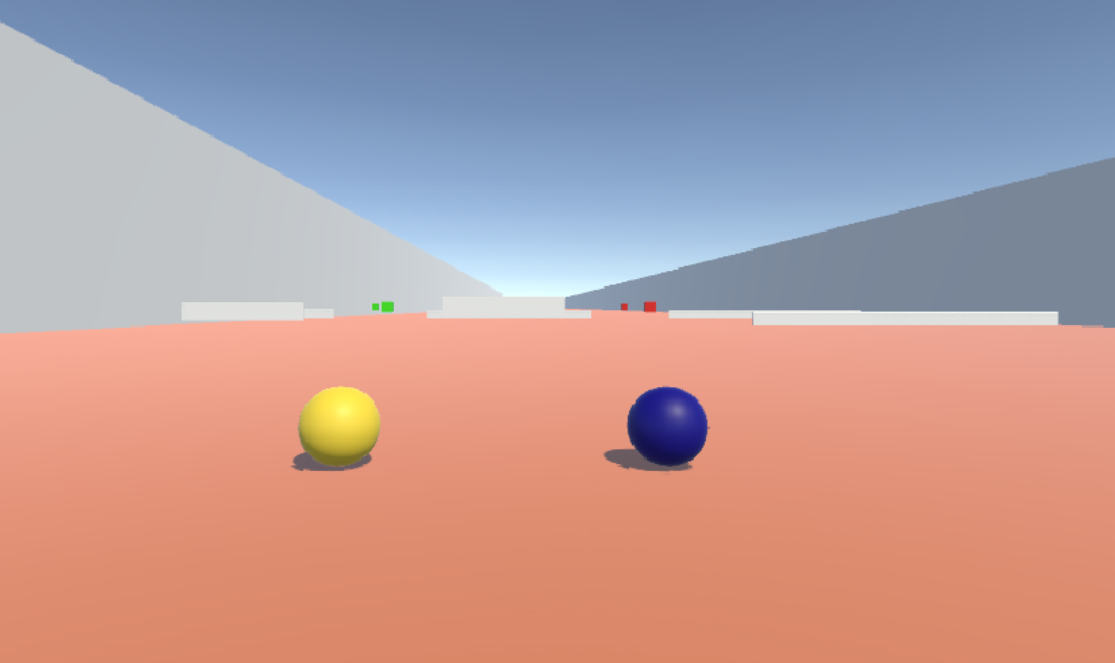
The next component to be rewritten was the camera controller. The top down view of the players was a very effective solution for maintaining a view of both players and stays true to the past versions of the HaptiBird project. When I was given my constraints for the project however, it was clear that the viewpoint needed to change to better achieve the goals of the study.
For my new version of the camera controller, I positioned two separate cameras at a fixed distance behind each player with the goal being to implement a third person perspective. The camera wouldn’t maintain the position behind the individual player I wanted unless I wrote a script to lock it in that fixed position. The below code snippets outline how I did this. Locking the camera directly behind the player would be good enough for our purposes, but I went ahead and added a function to ‘lerp’ the camera. This basically just means the camera will intentionally lag behind a little bit and smoothly realign itself over time, making for a nice passively animated effect.
1
2
3
4
5
6
7
8
9
10
11
12
13
14
15
16
17
18
19
20
21
22
public class camLock : MonoBehaviour
{
    public float cameraStickyness = 10;

    // public Transform center;
    public Transform target;

    // offset vector
    private Vector3 offset;

    // Start is called before the first frame update
    void Start()
    {
        offset = transform.position - target.position;
    }

    // Update is called once per frame
    void LateUpdate()
    {
        transform.position = Vector3.Lerp(this.transform.position, target.position + offset, cameraStickyness * Time.deltaTime);
    }
}
Also Featuring Split Screen!
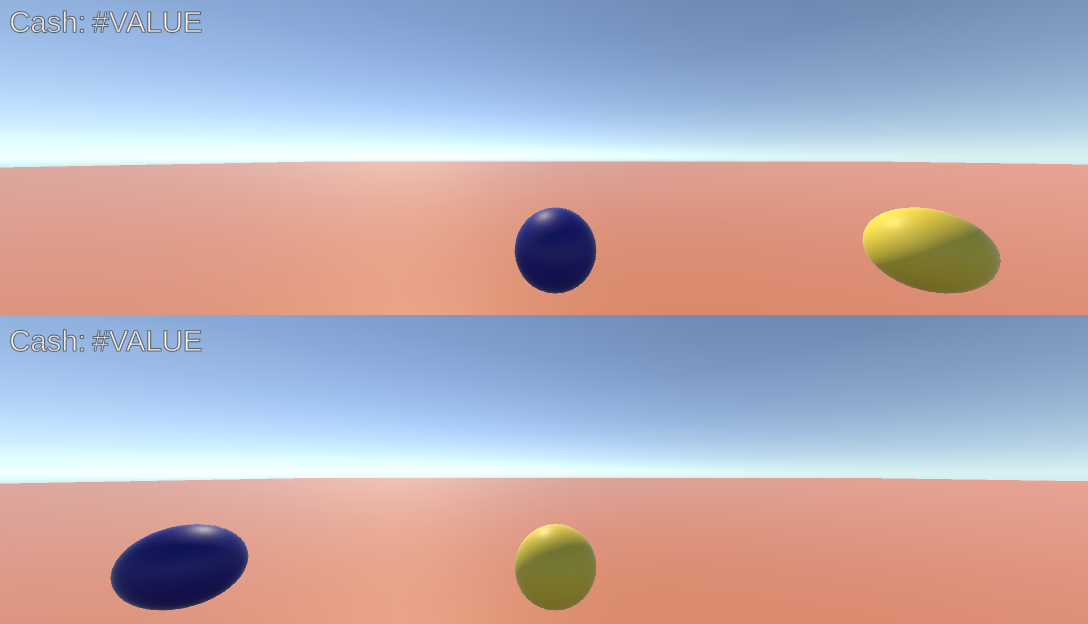 Adding split screen functionality was as simple as using the two cameras we made earlier, cutting the vertical screen real-estate in half, and placing player 1’s view on the top half and player 2’s on the bottom half. No code necessary for this part at all.
Coins
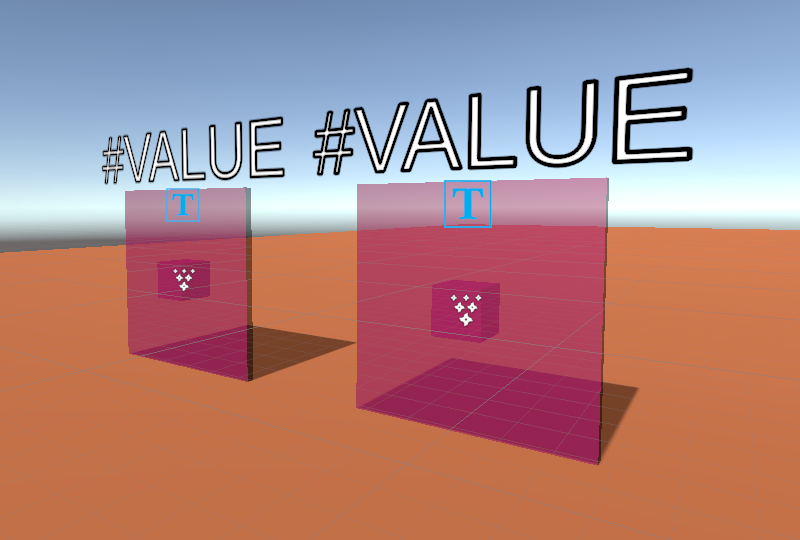
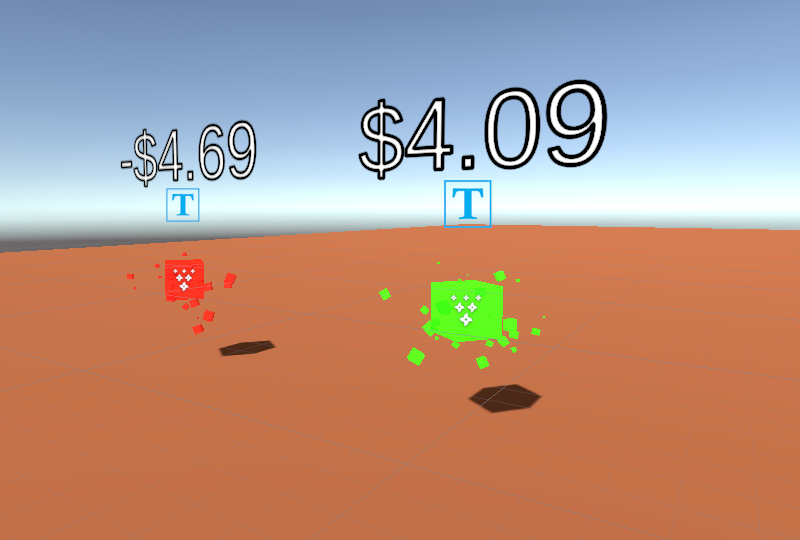 There also needs to be an object that players can interact with in order to gain or lose money. The coin object is designed to do just that and is actually quite a bit complicated for what it is. The coin consists of two primary pieces; the floating cube object, and an invisible wall that acts as a trigger. A script is applied to the trigger object that handles a lot of the logic for the coin’s value. Upon a new instance of this coin being created in game, it will randomly assign itself a value between two dollar amounts such as -$5 and $5. Upon determining this amount, it sets the color of the cube object and any conncted particle effects to red if the value is negative, and green if the value is positive. After all this setup occurs, the coin monitors and looks for if it’s been interacted with by a player. The interaction in this case is touching the trigger plane, and both players need to do this. If both players have touched the coin, it will play a particle effect, then add it’s value to the total score of each individual player.
Walls
There’s also a wall object that affects the players score in a similar way. The primary difference is that this wall object only needs to be touched by one player to be triggered. Once it’s triggered, a penalty can be applied to each players score and a particle effect of the wall breaking will play. The penalty by default is $2 but can be adjusted to any value desired. 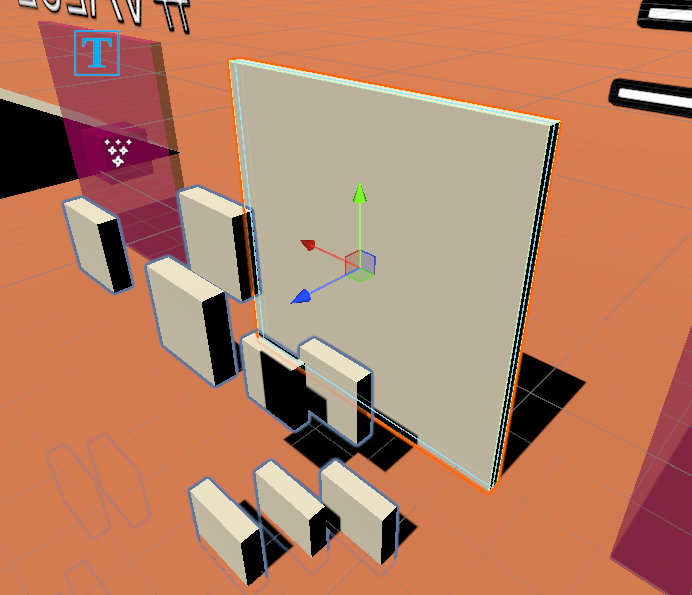
Second Rewrite of Input System, now Featuring Physics!
As it turned out, translation based movement was not the way to go. We wanted the players to feel like they had some weight to them and naturally react to their environment. This means I had to rewrite the user input system to instead make use of the Unity Physics engine. Now instead of each sphere gliding across the surface of the world almost as if it wasn’t touching it (because it wasn’t), the spheres would physically roll around. This made for a much better feeling player controller but a lot more work needed to be put in to ensure this always felt natural.
One of the problems with this input method is you have to make sure to cap the maximum velocity of a player traveling in the direction you want to go. This is because with physics based movement, you’re adding a bunch of forces that are acting upon an object. If for example the forward button is applying force in one direction on the ball, it will do that for as long as you hold the button down. This means you could very easily have an infinitely accelerating player that shoots off in one direction which is definitely not what you want.
The same holds true for when the force is no longer acting upon an object. The object naturally wants to keep moving in the direction the force was previously applied in, since it’s a sphere and has minimal friction for a physics object. If you want the stopping motion to feel more natural and stop a little more imediately after the player releases a button, then you have to detect that no button is being pressed, and actively apply a force to slow the ball down faster.
Below is an outline of the changes made to the input system to make it Physics based and some extra code to make it behave appropriately.
1
2
3
4
5
6
7
8
9
10
11
12
13
14
15
16
17
18
19
20
21
22
23
24
25
26
27
28
29
30
31
32
33
34
35
36
37
38
39
40
41
42
43
44
public bool controlVerticalMovement = false;
public int playerNumber = 1;
public float maxRollSpeed = 1000.0f;
public float accelerationRate = 500f;
public float decelerationRate = 2.0f;

PlayerController controller;
Rigidbody rb;
float horizontal;                 // Axis for horizontal movement
float vertical;                   // Axis for vertical movement
Vector3 forceDirection;

void Update()
{
    // Physics based movement system
    // Vertical Movement Logic
    if (controlVerticalMovement)
    {
        forceDirection = new Vector3(vertical, 0.0f, -horizontal * 2);
    }
    else
    {
        forceDirection = new Vector3(1.0f, 0.0f, -horizontal * 2); // Move forward constantly at max defined speed
    }
}

void FixedUpdate()
{
    if (forceDirection != Vector3.zero)
    {
        rb.AddTorque(forceDirection * accelerationRate);
    }
    // Slow down over time if no input.
    else
    {
        rb.angularVelocity *= decelerationRate;
    }

    // Clamp the speed to the max defined speed
    if (rb.angularVelocity.magnitude > maxRollSpeed)
    {
        rb.angularVelocity = rb.angularVelocity.normalized * maxRollSpeed;
    }
}
Tethered Together
The tether portion of the game is a bit complicated. Since the user input system is now using a physics based interaction, the springy effect of the tether when players are too far apart can also be physics based. This just makes things feel more natural overall.
The implementation of this tether is split into two parts, the visual and the physical. The physical implementation focuses on applying appropriate forces on each player to draw them together, but only when necessary. The visual is simply the rendered cable you can see in the game. Despite these two things having the visual illusion of being the same thing, the fact is they are entirely independant systems.
The Problem with Infinity
Now we’re on to the gameplay portion of this design. Based on HaptiBird 1.0 and 2.0, this new version needs to have an infinite, randomly generated level with no concrete ending point. This is a problem that’s been solved multiple times in the past by many developers including myself in my Unity Infinite Runner Project! My previous attempt at making an infinite level while mostly seamless wasn’t without it’s issues. The method involved creating a coridor that was just long enough that you couldn’t see the end of it. When you fully navigated through one segment of the coridor, it would teleport both the player and the hazards back to the beginning of the first corridor relative to the last place the player was standing. This for the most part created the illusion of an infinite level and hallway. The one big thing that broke the Illusion was when using Unity’s Particle System, there would be a pop-in kind of effect when the emitters are teleported without any way of changing that behavior. I plan on continuing to use Unity’s particle system, so I’ll have to make use of a different method.
Randomly Generated Walls
 One of the first problems to solve is the need to generate these gates randomly using the wall and coin prefabs I created earlier. This one portion proved to be the most unexpectedly challening of the entire project. To understand why, lets break down what needs to happen here in practice.
The gameplay of the HaptiBird game in all its iterations demands a set of gates that are randomly generated for the players to have to challenge, and work together to pass through. These gates are effectively a solid wall with two slits in them that contain a variation of what my coin object is in version 3.0. In order to create this same gate object dynamically in unity, you effectively need 5 different newly instatiated objects that update their positions and scales randomly, dynamically, and accurately. The first step of the script is to randomly select a position for coins 1 and 2 along the entire axis of the gate. The coins will randomize their width to be some value between 3 and 5 to add a bit of variation to the ‘difficulty’ of passing through each gate. Once a position for each coin has been decided upon and each coin’s trigger object has been confirmed to not overlap, we fill in the gaps with the wall object to complete the gate.
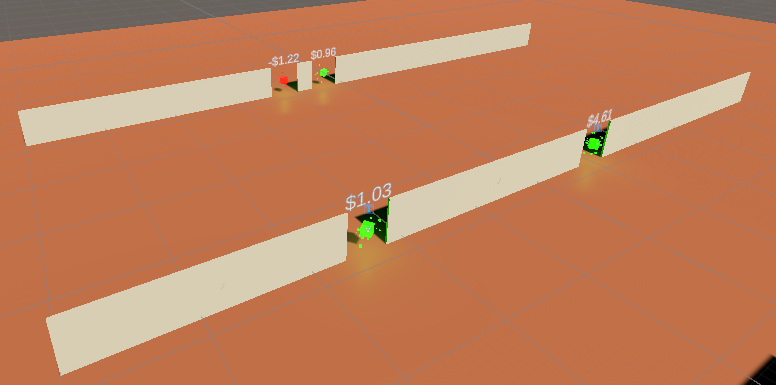
Infinitely Generated Segments, But Not TOO Infinite
 Now that we have an object for generating the walls, we can work on the infinite level illusion. The method I decided upon is a infinitely generated segment method. The theory is instead of moving parts of the level and the player backwards on a defined track, the track itself will instead be infinite allowing the player to move infinitely in the direction of the track. This is achieved by using a segment-based level generation aproach. When the game starts, the level will generate up to 5 randomized level segments ahead of the players current position. The player is able to freely move within these segments, but only in a forward direction. As each individual segment is passed through, old segments will be deleted.
Old level segments MUST be deleted when designing something like this. Since the game is designed to go on forever, you’ll run into a “Out of Memory” error if you let it run long enough. Granted this might be awhile on modern machines since they tend to have a lot of RAM, but this is just good practice.
Whats the Theme?
The time has finally come to decide upon a theme. The reason we need this is primarily to add some more visual interest to the gameplay. Collectively as a team, we brainstormed potential options for a theme and eventually space was thrown out as an option. After a unanimus vote, it was time to start designing the new theme!
Stars and the Night Sky
 First things first, we need the space part. There’s any number of different ways to achieve a space effect in unity, many of which were designed for fully open world style environments. Many of these solutions required a complete redesign of the current level, which is not something I wanted to do. The solution I ended up going with is very similar to what we did with the tether; creating the illusion of a space environment.
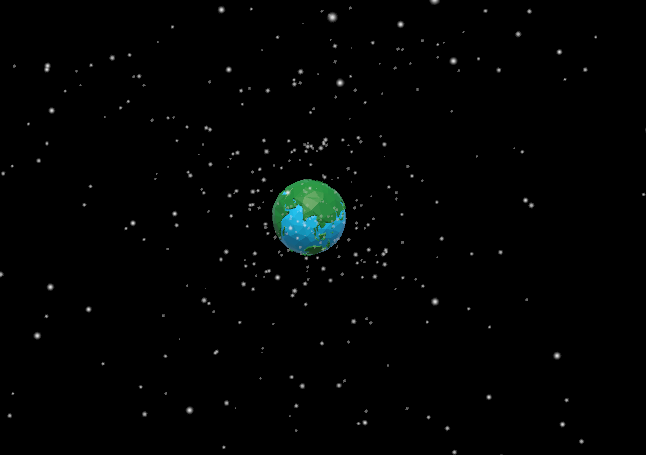
Now where did I start with this “Illusion of Space”? I started at the camera controller. Each camera within a unity scene has a bunch of features you can modify about how it percieves the environment. To create a good base for the space environment, I told each camera to only render the color black as the skybox instead of the styleized Unity default. This already made it look a lot more like the deep darkness of space, but it was missing a key element: the stars!
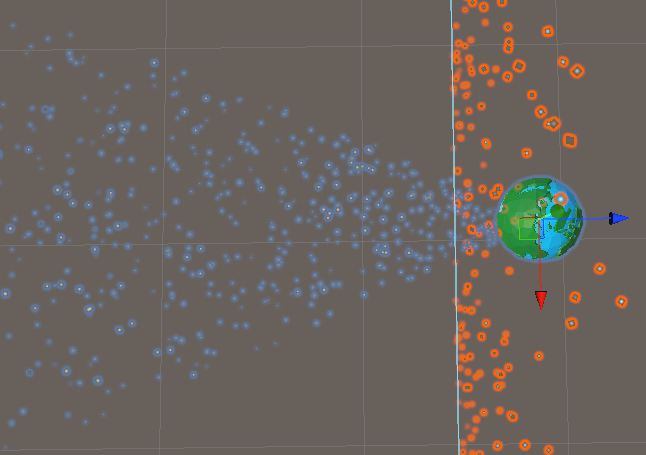
This is where the illusion element comes into play. To create the stars in the sky of space, I actually just used two particle emitters that constantly created star-like particles with white light emitters on them. Since the cameras of each player are for the most part fixed at the same distance and always pointing in the same direction, you can create a wall of star-like particles in the distance to create the feeling of far away stars! Then all you need to do to keep the illusion alive is to make sure the stars are always a fixed distance from the player’s current position with a script which I have outlined below. This by itself will work and create a very convincing space skybox, but to make it feel a bit more alive, a second particle emitter can be used. The job of the second particle emitter is to create a cone of stars moving towards the players with the origin set far in front of them. This creates the feeling of passing incoming stars and moving through space rather than just looking at it from a distance.
1
2
3
4
5
6
7
8
9
10
11
12
13
14
15
16
17
18
19
20
21
22
23
using System.Collections;
using System.Collections.Generic;
using UnityEngine;

public class starsLock : MonoBehaviour
{
    public Transform target; // This is the target object we're obtaining the Z axis position from
    private Vector3 offset;

    // Start is called before the first frame update
    void Start()
    {
        offset = transform.position - target.position;
    }

    // Update is called once per frame
    void Update()
    {
        // We're only lerping the stars to make it not jittery. It's not really requires since they're so far away
        // But also any time you can move things smoothly it's good.
        transform.position = new Vector3(transform.position.x, transform.position.y, Vector3.Lerp(this.transform.position, target.position + offset, Time.deltaTime).z);
    }
}
With this, the sky is mostly complete. I wanted to add a little something extra so it acutally looks like you’re going somewhere as you move infinitely into the distance, so I also added a planet earth that is constantly moving away from the players so it maintains that skybox look.
The Ground & Asteroids
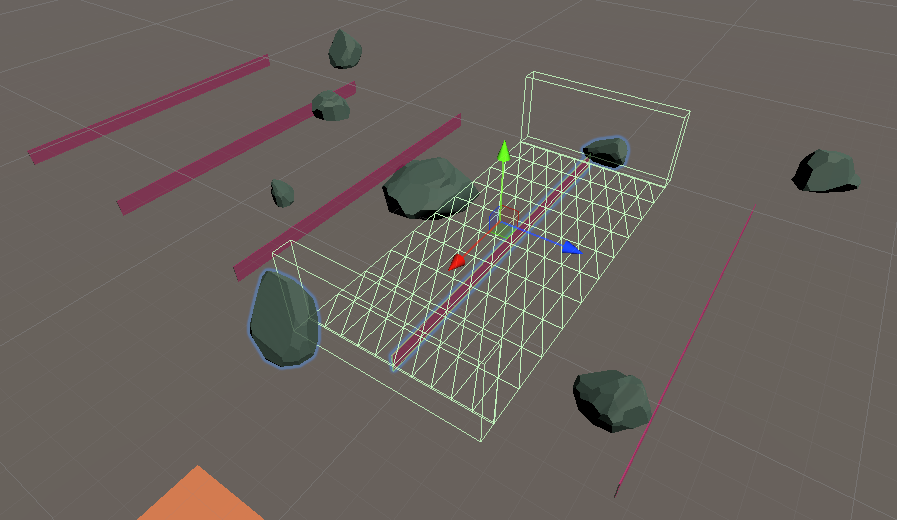 The next step is to change the look of the ground. The simplest thing to do to continue the space illusion is to simply disable the rendering engine for the segment geometry. This will result in each generated segment to be invisible and show the stars and night sky in the background. There’s a unique oportunity here since I defined that segment-based infinite level generation script. In order to add to the desire theme, I also added about 7 different varients of the segment that could be generated. Each varient still has the level geometry invisible, but also has some added asteroids floating in randomized positions rotating in place. This helps make the level feel even more alive than it did before, and in general looks a lot better than an empty void.
Players
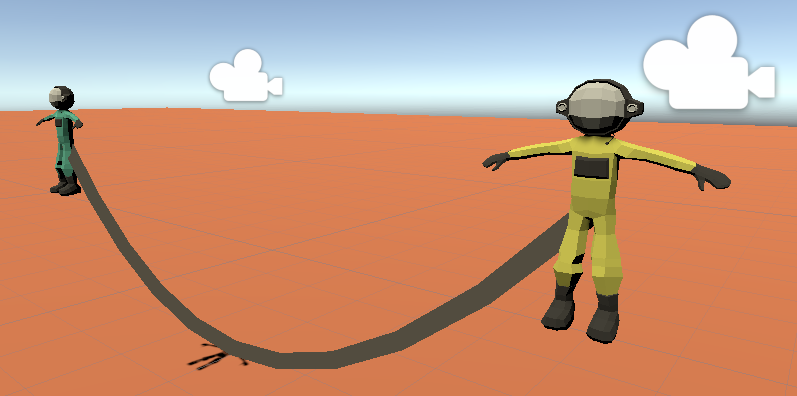 Multicolor spheres flying through space while very functional for the prototype, doesn’t exactly make a ton of sense contextually now with the new theme. To remedy this, I disabled the renderer for the sphere object similar to the level geometry to turn it invisible, then position an astronaut 3D model at the center of each sphere with the same blue and yellow color scheme. By using this positioning and an appropriate hirearchy where each model is a child of the sphere, the physical movement is still determined by the spheres while using the astronauts as the new player model and maintaining the correct positions.
The Players Need Animations
Of course we couldn’t just leave our new astronaut friends to tumble through space for infinity. Even though they could already control their trajectory, I wanted to give them more of a feeling of control that’s not quite so full of existential dread. I added a basic swimming animation to each player and added a script to make sure they accurately followed the trajectory they’re supposed to.
Data Backend
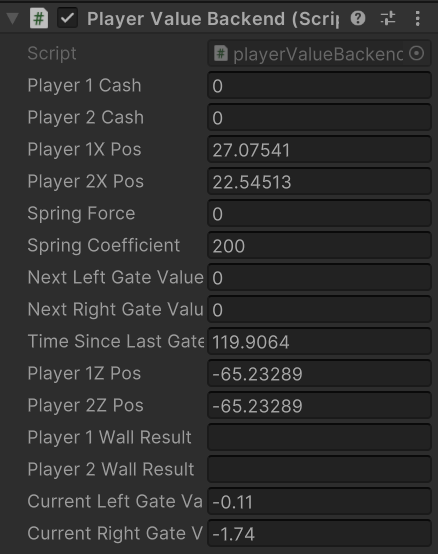 The backend of this new game collects a lot of data. Specifically, it gathers player positioning data, the spring constant of the cable connecting the players, the resistance it is exerting on each player, each players score, the value of the next left and right gate, which player hit which gate, and a lot more. All of this data is transmitted over TCP to a recieving client for further processing.
There’s two main packet types for the data transmission, the continuous packet that contains live information about the players, and the 1 time packet that is transmitted each time the players pass through a gate.
Haptic Feedback
Haptic feedback is handled by the Logitech peripheral driver made for the Unity engine. A constant force is applied to the wheel in the opposite direction the user is steering the wheel based directly on the amount of force being applied to the player by the cable. This helps the player understand the forces at play in the game so they can react appropriately.
Video Demo
“Haptibird 3.0 Video Demo” by Dawson Thompson
Final Thoughts
In reflection, I’m very happy with how this all came together. It meets all the requirements of the study and has a interesting design that will maintain player interest for the duration of a given study. The data stream works well and refreshes at least 60 times per second containing valuable datapoints for researchers to use.